|
Cat Toys and Agility Equipment DIY
BUILDING/MAKING/CRAFT YOUR OWN CAT AGILITY EQUIPMENT DIY PROJECTS
Many moons ago I started thinking about training some of your dogs to do Agility. Deron starting building me Agility Equipment to Standard for the Sport. When I started training a few of our goats to Agility on the Dog Equipment, Deron build more, and better equipment for goats. When I said I wanted to train some of my pet ratties (fancy rats) Deron started doing the math...to make sure that the sizes were right. And of course, when I said Rabbit Agility, he was building again.
Don't fret if you do not have a builder. There is much anyone can make. Just remember that SIZE MATTERS!
Most Rabbit and Small Dog, called Mighty Agility Dogs Equipment is the right size for cats.
NOTE: DIFFERENT CAT CLUBS HAVE DIFFERENT RULES AND REGULATIONS FOR THE SIZES AND STANDARDS FOR THE CAT AGILITY EQUIPMENT THAT THEY USE ON THEIR COMPETITIVE COURSES. LOOK UP THE SPECIFIC CLUB YOU WILL BE COMPETING WITH FOR THEIR INFORMATION. I have to add, I do not agree with some of the Regulations that are now set with some of the Clubs.
THE STANDARDS BELOW ARE SOME THAT WE SET AFTER SPENDING YEEEEARS WORKING WITH MANY SPECIES OF ANIMALS ON MANY AGILITY COURSES. WE ALSO HAVE WORKED WITH CATS FOR MANY YEARS AND KNOW THE LENGTH OF THEIR STRIDES AND HOW THEY "MOVE WHEN THEY WORK".
Building To Standard and Building For Back Yard Training 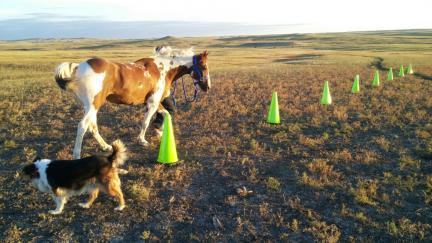
First and Foremost you NEED to build your Agility Items/Equipment sturdy and safe. You want Kitty to trust you, not fall or get shook and never want to play these games again.
Keep in mind that even though you are "just playing at home" you might want to keep your Agility Equipment as close to Standard Sizes for the Sport as you can. You never know what the future might hold. Plus. The Standards were made for a reason. The reason is, that is the size that is best for Kitty (or whatever animal), the most comfortable for body positioning when using, the most safe to use, the most practical.
If your cat does well and YOU are excited about the sport YOU will be the one people ask to help them train their cats. You might even start a Club or Group that meets with their animals...
And I can not say it enough....SIZE OF YOUR EQUIPMENT MATTERS! Horse Agility Equipment (yes, that's me in the photo) will not be suitable for Cats. Cat Agility Equipment should be made the size that Cats Need.
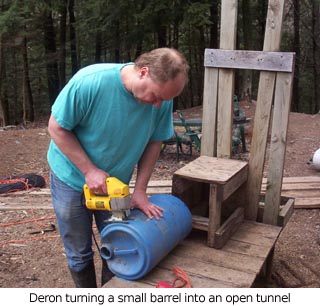
DIY Building Your Own Cat Agility Open Tunnel 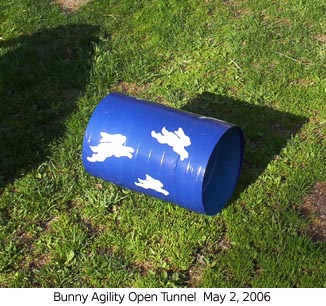
How big should your Open Tunnel be? Start with a small Tunnel, work your way up.
For a "Real Course", for Cat Agility Competition, The Tunnels should have approx. 12" to 18" diameter opening and be at least 4' long, up to 8'.
But for training, for at home, for fun, for showing off your cat's new sport, about anything will do that has an opening of at least 10" for an average sized cat. Larger Cats should have something taller.
Deron took an old thrown out small barrel and cut the top and bottom off, see photo above. I took it from there, cleaned it up real good then added Duct Tape, starting at the opening, half way in, tripled (so that there are no sharp edges, then taped the whole barrel. I cut out reflective rabbit shapes and added them for fun and decor.
This Barrel, now Open Tunnel, works great for training small dogs, puppies, cats, rabbits and ferrets.
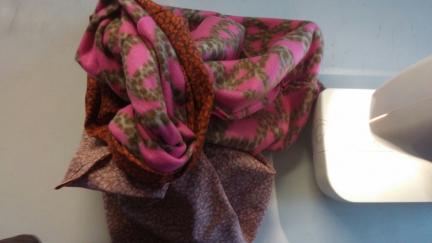
Cat Agility Closed Tunnel If you are going to sew your own Cat Agility Equipment Piece, that is DIY, you will need to decide the size of Closed Tunnel you are going to make for your cat(s), the color or print you might want for the project, and what you will use for a very hard sided opening for the Tunnel.
I might suggest, rolled wire (that is what I will use), make your tunnel to the size of a cardboard box you can easily bring home in the same sizes each time and cut about 8" - 12" long to hold the open open, or a stiff end with very stiff fabrics. You might find some sort of piece of plastic you could cut to size and sew into the open end of the Closed Tunnel that would hold it open for safe and stable entry. Also. A round barrel end could be cut and used, you probably want to sand each end after cutting so that it does not cut your fabric during use or when folded up for storage.
After you decide the size of Closed Tunnel you are going to make buy your fabrics accordingly.
Remember, you will want enough fabric for the opening end of the Tunnel, so do the math. I am going to have an approx. 12" round opening, so I am going to use approx (12 x 3.14) 38" - 40" wide piece of fabric. My Closed Tunnel is going to be approx. 45" long. So I bought 1 1/4 yards of cute cat print fabric and the same in a complimentary colored polar fleece. I will line my Tunnel, for stabilization, using the polar fleece.
To Create and Sew a Closed Cat Agility Tunnel you will need:
Sewing Machine, thread and a Plan, for sizing and the opening
Fabric, and the same size Fabric to line your tunnel for stability
Bias Tape or Cord for tying the tunnel into a ring when not in use
and: The all important whatever you chose to use for your Opening
Double check all of your math and cut your fabric. Do not forget that seams and your Opening Item will take up some of the inches you have decided on.
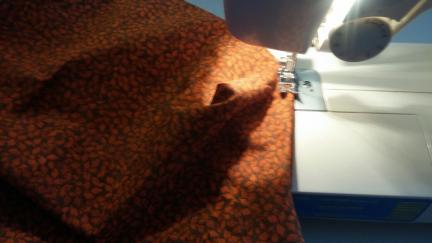
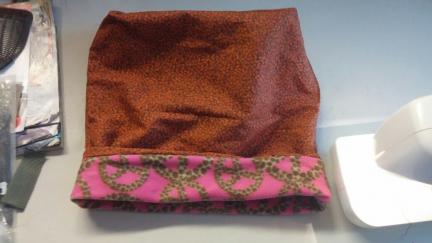
Sew your liner to your outside fabric with their right sides together, leaving, the closed side, the end where the cat will come out of, open for turning fabrics right sides out, and to add your opening piece into the inside of the tunnel.
Sew at least two pieces of bias tape or cord to the bottom, the closed side, on the outside of your tunnel, so that it will not distract Kitty, and so that the Tunnel will fold and tie and store easily. Make your pieces of ties as long as they need to be to go around all of the fabrics you are using PLUS your open end piece. Fold your ties in half, that is where you will put your seam...in the fold where you are holding the ties in half, short ways so that they dangle and are ready for use. Sew these ties on tightly, that is, go back over the seams several times each.
much more information and photos to come...
Building Your Own DIY Bar Jumps for Cats, Small Dogs, Ferrets, Rabbits and... Building Your Own Teeter Totter (Sea Saw) for Kitty Agility 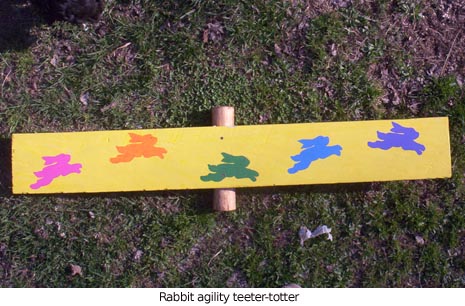
The Teeter Totter for Cat Agility should be approx 48" (4') long, 6" wide and have a 4" to 6" pivot point.
The top board should be one piece. That piece should be at least 3/4" thick so that usage and storage and moving it will not warp it.
Your pivot could be PVC Pipe, glued tightly to the, Just Off Center, of the top board, or a small piece of round wood, think tree branch, cut, debarked and also glued tightly to the top piece.
Building A Tire Jump for Cat Agility Making A Hoop Jump For Your Cat's Back Yard Agility Course 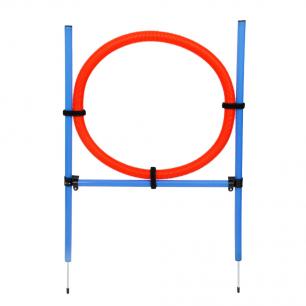
Hoop Jumps are different than a Tire or Window Jump....but not by much. The training is basically the same, the build and look is different.
more to come
How To Make A Window Jump For Cat Agility 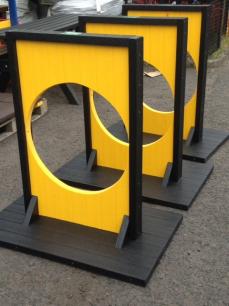
If you make your Window Jumps right, the main board will turn over and you can use this jump at two different heights.
more to come
Kitten or Beginner Cat Agility Jumps 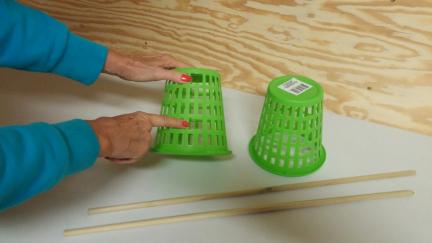
These are my $2 Kitten/Beginners Cat Agility Jumps. I bought the, 2 in a set, Baskets at the Dollar Tree (boy they owe me for all the commercials!) And the 4' Wooden Dowel cut in half for the cross pieces for .98 at the Hardware Store.
With Scissors I cut the squares larger, where my fingernails are pointing, for the dowel to set into.
With a Hand Saw I cut the Wooden Dowels in half.
You could paint the wooden dowels if you wanted to. The Baskets come in several different colors too.
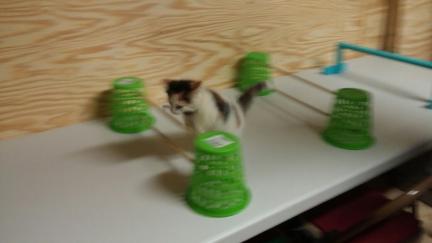 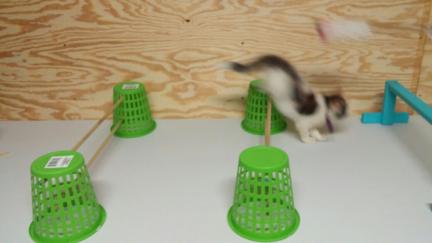
For Beginner Cats, or if you have more room than I do, you could use the Wooden Dowels at the full 4' if you like.
As you can see these little, inexpensive Cat Agility DIY Jumps work GREAT!
What To Use For Weave Poles For Cat Agility Training 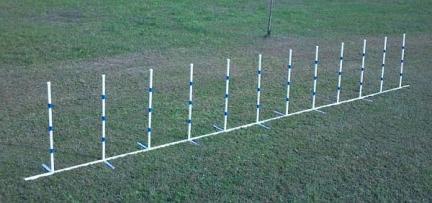
For Competition the Course needs to have a Minimum of 5 Weave Poles set approx 18" to 30" apart. Any closer and it is not easy for the cats to wind around.
Weave Poles need to be at least 12" tall and no bigger around/diameter than 5" each. Cones however work well even if fatter than Poles. However, cones larger or shorter than 18" would not be the best for Cat use. 18" cones are tall enough for cats to define, and the bases on 18" are not so wide that as the cat Weaves, you loose site of it.
We use "wooden dowels" for our cats Agility Courses. 1/2" diameter by 3' tall, and they are painted BRIGHT colors. When using 'poles without bases' each one needs to be "seated" in the ground at least 8" so that if they are hit by your body or the cat's body, they stand, but there is some 'give'. Paint them bright so that no one, including you or animals, accidentally runs into them and trips or falls on or with them. Fatter dowels could be used, thinner is not recommended.
There are many items like the wooden dowel that could be used. With stands or not. Just make sure that they item sticking out of the ground/floor is safe and not sharp.
We use 6 Weave Poles. Once your cat has learned the Weave Poles you can set up as many as you would like. There are Dog Events where all they do is race to Weave many poles set up in a row. Their event is set up "dog against dog", that is there are two side by side Weave Poles Courses and the two dogs "go" at the same time. Fastest dog goes on to compete against other winners. There is not reason this fun event could not be set up for cats.
MAKING WEAVE POLE STANDS
If you train Kitty indoors you will need Weave Pole Stands. It is not like you can stick the Poles into your floors.
I am sure you have seen the PVC Piping that holds Weave Poles within. If you make a set of these MAKE SURE THE BASE IS STURDY! Without a base, the PVC Pipping with poles sticking out is 'an accident waiting to happen'.
Before you jump in and make your Weave Poles as a group, think about several things...
Is this set of Weave Poles going to be used for Kitty only? Or do you have other species of animals that you might be working with? This could change how far apart you want to set your Weave Poles in the base.
Where will you store this set? Is this piece of Agility Equipment going to be able to be set up in your Agility area at all times? Or will you need to take these items apart for storage? That will matter on how you build the set.
How many Weave Poles do you want in your row? You might need to build your set so that it can be added unto or taken away from. Less for training, more for after your animals are weaving well.
Personally. I prefer individual Weave Poles that can be stored easily, with little room, and added to or taken from quick and easy.
One way to achieve both ideas is a base with holes that are each the size of the poles you will be using that can have or not have a 'full boat', that is, you can set as many poles into the holes on the base as you like, or not. Keep in mind, your base will still need 'legs' (flat on the ground) for stability. Or the base could be dug in, just a small trench, for stability and to make the base flat to the ground surface.
Ask yourself not only how often you will use the equipment you are using and how you will set it up? Where will you store the equipment, if you take it down, and how often will you set it up? Will you be transporting the equipment and how?
There are 'cheap and easy' ways to have a LOT of fun with Agility. Just make sure that 'cheap and easy' are ALWAYS made stable and safe for human and animals.
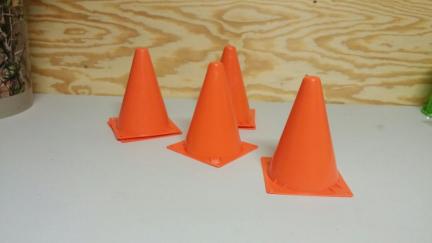
Traffic Cones for Weave Polls
Traffic Cones can and will make GREAT Weave Polls for any species of animals. Traffic Cones come in several sizes and colors.
Cones are also a good training starter as the cat will be able to see and understand the size, thickness, of the cone and what you are asking better than a skinny stick out of the ground.
ideas, information, measurements and photos coming soon
Building A Sturdy Balance Beam for Cat Agility A Cat Balance Beam should be approx. 3' to 4' tall. It should be approx. 6' long. The 'walking board' should be approx. 3" - 6" wide with a non slip surface for the cat to walk on. The legs should be wide enough to make the Balance Beam very sturdy for cats jumping onto and off of the Balance Beam. The feet of the Balance Beam should be non slip.
For Advanced Cats and Advanced Cat Agility Classes, a taller, longer, more narrow, Balance Beam could be used. However, for the average cat, running along an Agility Course, a Stable, more wide Balance Beam is safer and less intimidating for the cats using it.
more to come
I have seen Cats in Competition, set up by Cat Clubs, people who are suppose to know about the sport, using these tiny A Frames and I am wondering (as I roll my eyes)... "Why?"
Cat/Animal Agility A-Frames need to be big enough for the cat/any animal using them to climb up one side, many times coming in to it from a run, and walk or run down the other.
It needs to be large enough so that kitty's body is NOT half way up while the other half of the body is half way down. The cross pieces, where Kitty walks the board, on the A-Frames I saw in Cat Agility Competition were so close and stuck out so far, that they interrupted the cat's strides, and disrupt Kitty's paws, of the cats that were using it. And the danged A-Frames were so narrow I thought they might tip over as the cats were at the top, again, with half their bodies up and half down...
Did the builders, who I am sure who had 'good intentions' do any 'homework on agility training and equipment' before building these unsafe pieces????
An A-Frame should be wide enough for the cat's body but not so wide a lion could walk it. It should be tall enough for the cat's full body to be a ways off the ground/floor. It should have a non slip surface for footing, but not so many cross pieces, too close together, that they interrupt the natural movement of the cat's normal stride.
An A-Frame for Cat Agility should have each side walking boards approx. 48" long, 18" wide, and with a 45 degree angle. The walking boards should have a non slip surface. Cross Pieces are fine, that is small flat boards screwed onto the walking boards, but need to be placed no closer than 8" to 12" apart. Cross Pieces are to stop slipping, not to become part of the footing.
Cross Pieces for non slip footing should cut to the same size as the width of the walking boards but be no wider (that is stick out from the board) than 1/4", 1/8" would be better as it would not interrupt stride. They are to catch slipping feet, not used for steps.
The A-Frame needs to be stable. Very Stable. If it is a permanent piece of equipment in your agility area, cross sections of wood or PVC should be attached at the bottom so that it is always open at the same angle with the ability to hold approx 30 pounds. Always make it a bit stronger than you think you will need.
If your A-Frame is portable, and folds, it will need hinges at the point where the walking boards meet. It will also need attachments to hold the frames firmly together as it is walked, run on and jumped on and off of.
If painted the last 12" from the bottom upwards, should be painted a different color than that rest of the A-Frame. This is to make sure, from a distance, that the cat has touched the A-Frame in the proper manner, going up and going down the piece of equipment. This is why you see the yellow and blue pieces of equipment so frequently.
Building The Cat Pedestal or Pause Table or Pause Box DIY Here is going to be where size, that is the size of this piece of Agility Equipment will be differences of opinion. And What Are You Building? A Pedestal or a Pause Table. They can be 'one in the same' and they can be very different pieces of equipment....depending on what you are using it for.
The Pedestal
A Pedestal is to most folks the "Tada!" piece of equipment. Where an animal goes and sits after performing a trick. Where they 'Sit' and 'Sit Up' and 'Sit Up and Give a High Five'.
A Pedestal could be the same 20" x 20" as a Pause Table and used for both. However, it can also be more of a taller 'stool' with a smaller area for the cat to sit on. Making the Pedestal looking like a bigger deal than just a 'chair'.
However you make your Pedestal it NEEDS TO BE VERY STURDY! Your cat is going to be taking a big jump to get onto it. The legs need to be tilted out for more stability when the cat comes in from a run with a flying leap to get up onto it and or jumps off the stool with the same enthusiasm.
If you buy a 'bar stool' (check resale shops) you will need to reinforce it if it is not very stable. If the top of the stool is wooden or plastic, you might want to add fabric so that Kitty does not fly off the side as it comes in for a land.
The Pause Table
A Pause Table can be a simple as a piece of wood, or even cardboard cut to size, approx 20" x 20" square, or a piece that is the same size on legs that are approx. 8" tall. Standard would need the legs.
Plywood cut to size then painted with an inset 1" x 1" frame on the underside, set upon 2" x 4" legs cut to 8" each would work wonderful! These can be decorated or just painted one color.
The Pause Box
A Pause Box is an area, marked on the ground, where the cat is suppose to go into, sit down and 'pause'.
We use a square of PVC Piping. It is easy to move about, to store, and for Kitty to understand.
The Pause Box for a cat should be approx. 24" x 24" so that Kitty's tail is mostly, if not all the way, into the box.
Pause Boxes could also be make of wood, painted to match the rest of the equipment, as long as it is still very bright and can be seen easily by cat and human from a distance.
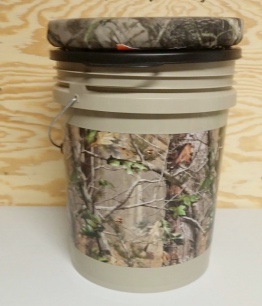
Training and Trick Pedestals
We used to have a very small house. I bought two plastic 5 gallon buckets and two non-slip lids. The lids are padded and fabric. These work very well, with weight inside them, for training Kitty on and off of, as well as having Kitty jump between and doing tricks on top of.
Inside the buckets, I store my cat items. I have my grooming supplies, extra or new not yet given toys, other agility items, and such inside. This adds weight and stability to the bucket, and is a great place to keep all these items together and handy...and out of the way.
More Information and Ideas Below, but I wanted to INVITE YOU to Join Us At:
I have hosted a Cat Tricks Yahoo Group on Yahoo for many years. I hope YOU will join us there and tell us all about YOUR kitties and cats!
CAT CRAFTS
Ideas, Information and Patterns for making ~ DIY ~ your own Cat, Feline, Kitty, Kitten Toys and Other Cat Items. Some Items Will Take Less Than 1/2 Hour! ~ Some, Only Minutes!
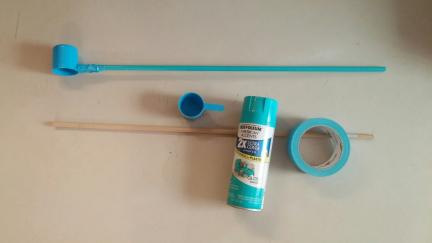
Cat Cue Stick ~ Feathered Teaser Stick ~ Cue Stick with Treat Cup 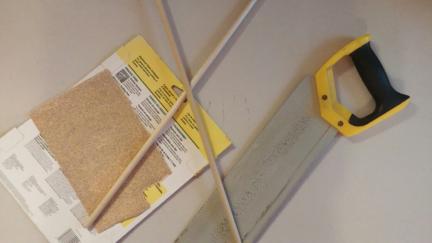
Cat Feathered Teaser Stick
You Need:
A thin wooden dowel
saw and sand paper
you might want to paint your wooden dowel
Some Feathers
needle and thread
duck or electrical tape
a short cord or piece of rope, however long you would like for it to be
if you like, add a small bell or two
Cut your wooden dowel to the size you would like to use for your own cat. Paint or not.
Sew the feathers to one the end of cord, if you do not sew, just tape well, but the feathers will come out easier when Kitty plays with it.
Tape the other end of the cord to the wooden dowel.
Cue Stick/Wand with Treat Cup
You will need:
Wooden Dowel or the other half if you cut your dowel in half for a Feather Teaser
Saw and Sandpaper
Paint
Small Scoop from coffee or the like or Spoon
Duct Tap
Cut a wooden dowel to approx 18" (1' - 2' is fine)
Sand paper the end where you made the cut
Paint to desired color or leave as is...let dry.
Using Duct Tape, and it comes in so many colors and prints now, tape your scoop or spoon on one end.
These type of Cue Sticks are really good for setting a treat, or scoop of canned cat food inside of, to teach your cat to follow the Cue Stick and get it's treat as soon as it gets to where you have asked it to be. Really good for Agility Training.
These are so easy to make and so enjoyed by cats and kittens!
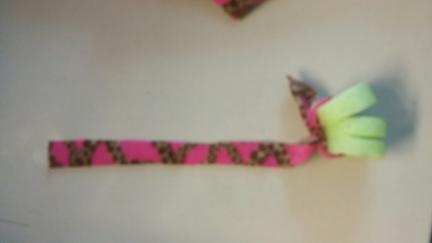
But good/thick Polar Fleece. You do not need much. If you know someone working on a Fleece project, ask for the scraps. Scraps can be cut into strips in a circle and work very well.
more to come...
Stuffed Kitty Toy with or without Cat Nip 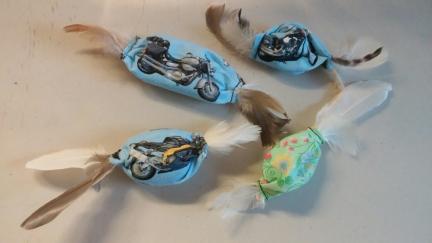
You Will Need:
Small Pieces of Fabric approx 5" x 4", but any scraps will do...and if you are setting up the sewing machine, make more than one of these and put some of the extra finished toys up for another "new toy day". Think Holiday Prints and think of friend's cats that might like a little toy too.
Stuffer...could be cotton balls, batting or stuffing from craft stores.
Crinkle Noise, think the inside of the box wax paper from crackers. Wash, of course.
A Few Feathers. Our birds moult here so we have many
A sewing machine or needle and thread.
Bell for inside or not
Cat Nip for inside or not
Turn the little piece of fabric, right sides together and make one stitch down the 'long' side of your fabric piece. Turn inside right.
Roll one end, about 1/2" to 1" down from the edge, stick your feathers into the area you will stitch so that the feathers will stick out as 'teasters'. Sew tight.
Stuff whatever you are putting into your toy. Cotton, crinkle, bell, catnip, crinkle, cotton. You want each end of your toy craft to have a soft stuffing.
Twist and add feathers to that end and sew shut.....easy!
Give this to your cat and watch it LOVE your crafting!
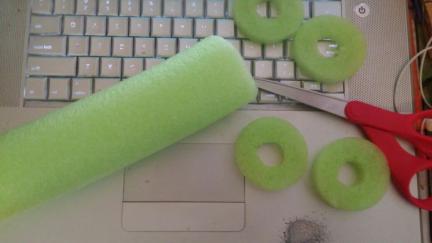 
Pool Noodles are not only good for the Pool, they are GREAT for Crafts. I bought mine at the Dollar Store and use them for all sorts of things...see faroutliving.com for Pool Noodle Craft Ideas.
This one I cut into little sections. Once of these will be given as is to Mrs. Dillion to bat around. The others will be strung into a strip of Polar Fleece for a bigger toy. These, strung, can also be hung from chairs or crate fronts or such.
You could wash these strung toys in the washing machine with towels on cold. Hang to dry.
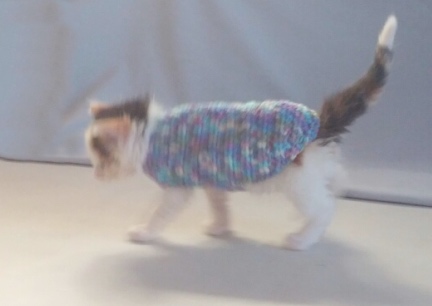
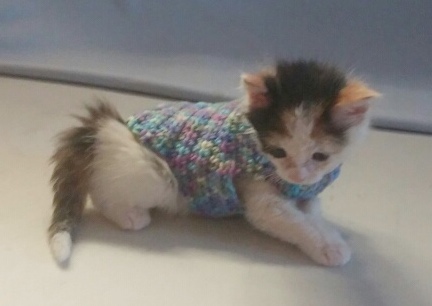
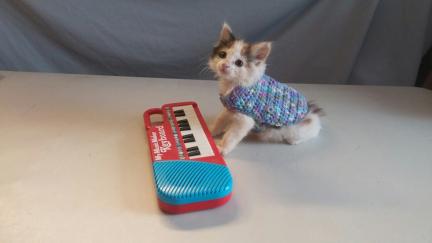
Cat Sweaters should fit Kitty snug, other wise a cat will 'step' or 'roll' out of it, worse, could get caught inside of it.
In the photos here you can see Mrs. Dillon wearing a sweater I made for my Guinea Pigs...it fits her for now. I will, of course, need to make her a larger one as she grows.
You will need to measure your cat before starting your sweater, and because you are making Kitty a Custom Sweater, you really need to have a bit of experience with either knitting or crochet. If you knit, you need knitting needles of the size you have decided to use for the size of stitch you want for your Cat's Sweater. If you crochet, same thing, choose the size of crotchet hook you want to use.
Depending on the type of stitching and size of your stitches, you will only need one or two at the most, skeins of yarn. Buy two if you want contrasting, or three if you are doing some sort of pattern that calls for it.
Teach your cat to wear clothing so that it is comfortable in them.
I LOVE veragated yarn. It is not only pretty to look at, but hides a lot of errors that can be made as a person knits or crochets along. It also comes in so many seasonal and holiday colors.
Once your cat is comfortable wearing Clothes, it will be able to do the little things you teach it while wearing them, adding 'the cuteness factor' to every little thing it does.
KITTEN SWEATER - CROCHETED 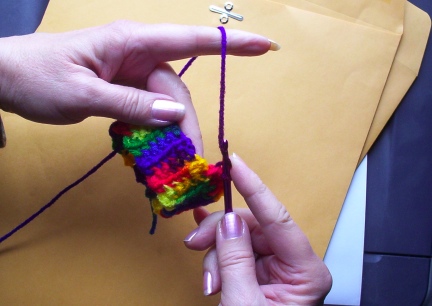  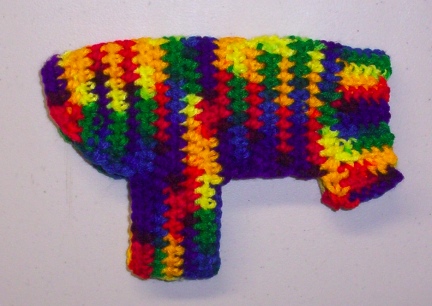
This little sweater will only take an hour or so. I used an H hook and Mexican Rainbow colored variegated medium weight yarn.
Chain 7
Make a cuff by single stitching into the front one piece of yarn in each stitch. Chain one and continue this for approx. 7". Slip stitch your two ends together and turn inside out. If you turn your sweater and the yarn is coming up from under the neck cuff, turn the cuff back to the original position and flip the other direction.
Slip stitch four stitches away from the middle of the cuff (where the seam is.
Chain one and do a 1 1/2 stitch all around until the last eight. You will be four stitches from the seam of the cuff.
Chain one and turn, you will put in an additional 6 rows of this length.
On the 7th row when you get to the end of the sweater body, chain 25 (this will be your belly band.
For the next five rows you will be making your belly band as you add to the sweater.
The next two rows will end equal to the front of the sweater before the belly band was added.
Decrease a stitch in either end of the next to rows.
Decrease twice end each end of the next three rows
Tie off and tuck extra yarn
Add a button on the outside of the belly band so that when buttoned the band tucks under the sweater against the Kitten's body. The button will add adaptability to the sweater.
Put on your kitten and enjoy....be sure to get a photo!
Your new sweater is of course machine or hand washable. I hang mine to dry.
To continue to use this pattern as your kitten grows, use a larger Crochet Hook and or add stitches...
We also sell these sweaters in our on line store.
This is a pattern that I reworked for a Cat Body....but measure your cat and make any adjustments you need to make as you create your own Cat's Sweater in the colors and type of Yarn you want to use. Using a larger Hook will make the item larger, using a smaller Hook will make it smaller. This pattern is NOT the one I used that you see in the photos here.
Your Will Need:
Yarn: Approx 2 Skeins
Crochet Hook: Size I
Yarn needle
Gauge: 12 sts = 4”; 16 rows = 4” in pat. CHECK YOUR GAUGE. Use any size hook to obtain the gauge.
SPECIAL ABBREVIATIONS:
Lsc (Long Single Crochet) = Insert hook in st indicated one row below and draw loop through, yarn over and through 2 loops on hook. Skip st under Lsc.
dec (decrease) = draw up a loop in next 2 sts, yo and draw through all 3 loops on hook.
PATTERN:
Row 1 (Wrong Side): With CB, ch 1, sc in first sc, * Lsc over next sc, sc in next sc; rep from * across; turn.
Row 2: Ch 1, sc in each st across changing to CA in last st; turn.
Row 3: With CA , rep Row 1.
Row 4: Rep Row 2 changing to CB in last st.
Rep Rows 1-4 for pat.
NECKBAND: With CB, ch 6.
Row 1 (Right Side): Sc in 2nd ch from hook and in each ch across; turn – 5 sts.
Row 2: Ch 1, sc in back lp of each sc across; turn.
Rep Row 2 until 29 rows in all have been worked, changing to CA in last sc of last row. Fasten off CB.
BODY- Row 1 (Right Side): Working across long edge, ch 1, sc in each row end across; turn – 29 sc.
Row 2: Ch 1, work 1 (2, 1) sc in first sc, * 2 sc in next sc, sc in next sc; rep from * across – 43 sc.
Row 3: Ch 1, sc in each sc across, changing to CB in last st; turn.
Now work in pat for 2 rows.
Divide for Leg Openings- Row 1 (wrong Side): Keeping continuity of pat, work across first 5 sts; turn. Work even in pat on these sts for 9 more rows. Fasten off. With wrong side facing, skip next 3 sts of last long row for leg opening; join yarn and work in pat across next 27 sts for back for 10 rows. Fasten off.
With wrong side facing, skip next 3 sts of last long row for 2nd leg opening; join yarn and work in pat across last 5 sts for 10 rows. Do NOT fasten off.
Next Row- Join Underbody: Work in pat across first 5 sts, ch 3, work across next 27 sts, ch 3, work across last 5 sts; turn.
Next Row: Work in pat across first 5 sts, sc in next 3 ch, work across next 27 sts, sc in next 3 ch, work across last 5 sts; turn – 43 sts.
Work 1 row even in pat
Shape Back: Keeping continuity of pat, dec 1 st each end of next row, then every other row 13 times – 15 sts. Fasten off.
Leg Openings-Rnd 1: With right side facing, attach CB in any st at leg opening; ch 1, sc evenly around; join with a sl st in first sc.
Rnd 2: Ch 1, sc in same st, * dec, sc in next st; rep from * around, adjusting at end of rnd as necessary; join.
Rnd 3: Ch 1, sc in each sc around; join.
Rnds 4 and 5:
Rep Rnds 2 and 3.
Rnd 6: Ch 1, working from LEFT to RIGHT, work 1 rnd Reverse sc. Fasten off.
FINISHING: Sew underbody seam from Neckband to the first shaping row of Back.
Edging: With right side facing, join CB in seam; ch 1, sc evenly around entire edge working 3 sc in corners; join to first sc.
Next Rnd: Ch 1, working from LEFT to RIGHT, work 1 rnd Reverse sc. Fasten off. Weave in ends.
First you will have to decide where you will be hanging this Hammock you want to make for your Cat. That might help you decide on the size; that and how large your cat is, or is going to be.

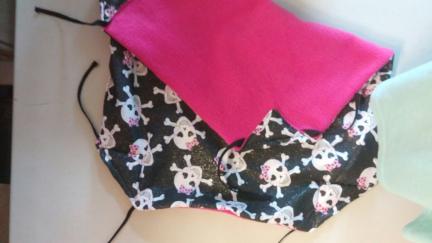
You will need two layers of fabric. It is nice to make one side either, fake fur or polar fleece. You will also need a thicker Bias Tape. This will hold the two fabrics together and be your ties at the corners.
Your Bias Tape needs to be cut to approx 12" each. You will need 4 pieces, one for each corner.
I sewed my bias tape into each corner so that it kind of 'rounded off' the corners for hanging. You could, if you like, tuck the bias tape into your corners as you sew the two pieces of fabric together. When it is turned outside right, the taps will be there to tie unto the area you want your Kitty Hammock hung.
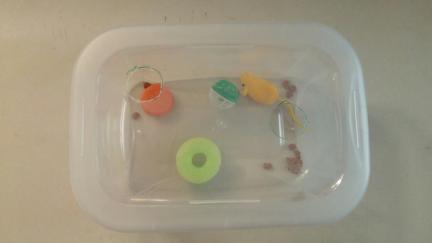
This is a fun and easy craft to make a toy that Kitty will LOVE! A Cat Treasure Box.
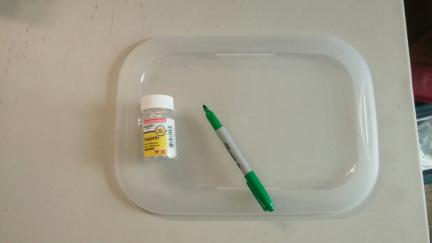
Your Will Need:
One any size storage box/container, I used a Shoe Sized Storage Box
Something small and round to trace, I used an aspirin bottle
A very shape knife or razor
something to cut on...such as wood
sandpaper in a very fine grit or nail file
a few Kitty Toys
a few Cat Treats
Maybe a little Cat Nip

Take the lid off your storage box and trace a couple of holes that are big enough for Kitty's hands, but not Kitty's face. Place these anywhere on the top of the lid you would like, you may even put some into the sides of the box too, and add as many or as few holes as you would like.
Cut the holes out. Sand the holes is they are sharp with a nail file or sandpaper.
Place a couple of Cat Toys, a few Cat Treats, Cat Nip if you like, into the box. Put the lid on the container and make sure the lid fits tight.
Show it to Kitty and give it a whirl, or shake, so that the items move about. Set the box in front of Kitty and watch the fun.
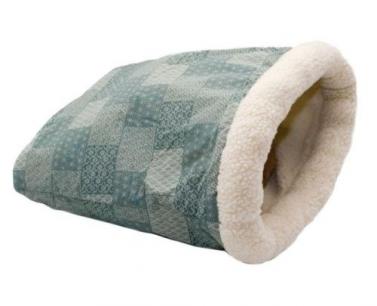
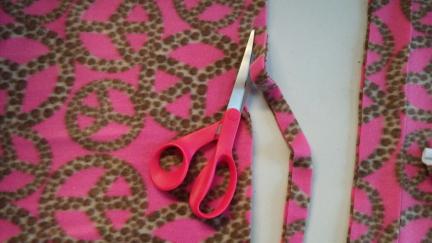
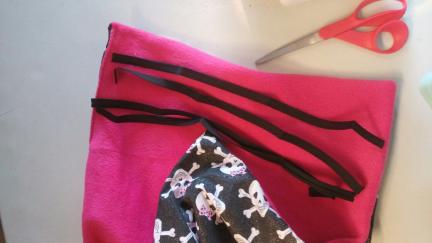
Cats LOVE these Fabric Sacks! You will be able to pick out your favorite, cute kitty print or furniture matching fabrics for your own cat's Bed Bag.
For the one I show in these photos, I used scrap fabric I had around. And the whole craft, start to finish, only took me 20 minutes.
You will need:
approx. 1/2 yard of fabric
the same amount of fabric for the liner, you could use; Polar Fleece, Fake Fur, or just another cotton blend in a matching or contrasting print.
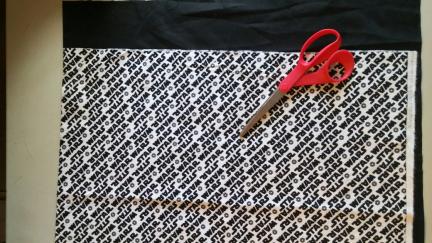
Scissors
Thread
Sewing Machine
These are so easy to sew and fun to make and you will enjoy seeing your kitty playing and sleeping inside the bed your crafted for it.
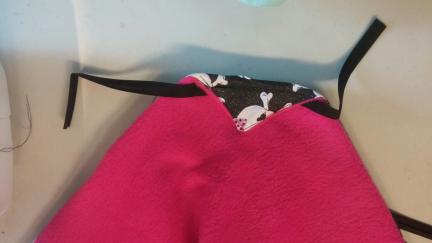
Cut your outer fabric to approx 45" x 18". Fold over, right sides together. Sew up both sides, leaving the top open, sew this with the right sides together.
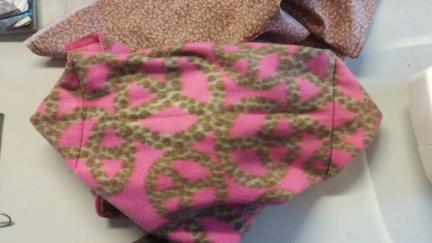
At the bottom of each side where the seams meet the bottom, turn your piece and sew a "box stitch" or "bottom" or "gusset" into each side. Make about a 6" seam.
Cut your inner fabric just the same, only about 1/4" smaller, so that it fits down into your outer side well. Sew it the same, but leave about 8" open on one of the sides, approx. 6" down.
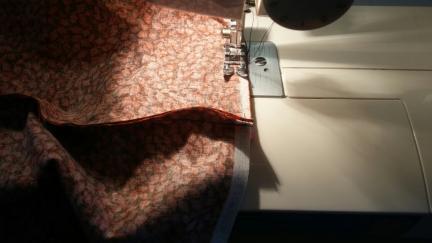
Sew the two pieces together, right sides together, lining up the side seams.
Turn the piece, now sewn together, using the opening at the side of the inner piece. Tuck, Tuck, Tuck each corner as you set the inner side into the outer side of your bag.
Pull the side back out of the bag, just far enough to sew the seam down, after tucking the raw edges in. Make your seam. Tuck the bag back together. Fold your outside liner over the top about 4" and pull tight at the two sides to set snug.
Your new Bag Bed or Sack Toy is ready for kitty!
 
I made this one for some friends cats. Our friends bought new Indian Motorcycles the Summer I made this, and I thought this would be fun for them, all, cats and humans. I also sent the Motorcycle Cat Toys with the Indian Motorcycle print Cat Sack.
Hobbies, Holidays, or match your furniture...this Cat Sacks are fun.
A 5 Gallon Bucket with a Lid can become not only a Pedestal for tricks, but also a Toy Box for all those Kitty Toys.
Cover the inside of the lid with non-slip surface...a Yogo Mat cut to size would work great (just vacuum to clean hair out now and again). Cut your Yoga Mat to size then glue it down with a good glue that adheres to plastics. Let set 24 hours minimum.
Duck Tape comes in a variety of colors and prints, choose one and cover your bucket with it. You might want to match your other Trick Props or Agility Equipment.
Use this Pedestal for your cat to go to after a trick, to do tricks such as 'sit', 'shake', 'wave', 'spin' and more...
And when you are finished training or showing off your cat to others, pack up Kitty's 'stuff' inside the bucket and put the bucket in it's storage area, or where Kitty can get up on it and feel safe.
Be aware that Kitty Litter buckets normally have a more narrow bottom than their tops are. This will take away the stability of the bucket that Kitty is jumping up on and working on top of.
FREE CAT/KITTY/KITTEN AGILITY EQUIPMENT!
If you look around there are items you can find for FREE to use for Cat Agility. What are some of those items?
Be Green! Recycle, Re-Purpose/Repupose, Reuse! If you live on a Farm or Ranch we all call it "Junk Around the Farm/Ranch".
Barrels
Car Wash Barrels; Even the 30 gallon barrels can be used. Look around at photo to gain ideas at how useful a Barrel can be. They can be used as is for some of the Agility Equipment and drilled to make other types.
Wood From Work Sites;
Many times when Public Places add on, or do some work around the buildings you might find perfectly good pieces of lumber in the trash cans. Ask first. Make sure the wood is good before removing it. Make sure it is large enough for what you want to use it for. You might also find Orange Fencing that could be used for one thing or another.
Old Tarps
Many times people have an Old Tarp laying around. Just make sure that if it has holes in it that a foot could get stuck inside of, you trim it down.
Logs and Branches
Logs and Branches can be used for Jumps, to Hold the Tarp.
Make sure these come off your own property or that you have permission to gather them.
If you are cutting these off YOUR OWN trees, make sure you know what you are doing. Keep it safe.
Old Hoses
Old Hoses can be cut and made into Hula Hoop Sized Hoops to Stand in. This could become your Pause Box.
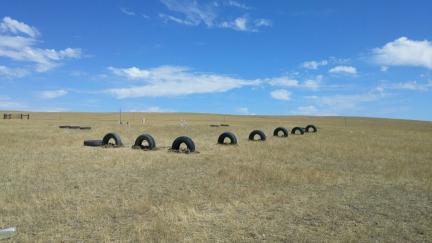
Car, Truck and Bicycle Tires
Old Tires can be made for many things in Cat Agility Equipment. From Pedestals to Jumps to Stands for Equipment. You can dig them into the ground and use them, this way too, for Jumps, Weave Equipment, Tunnels and more...and you will not have a place for bugs to breed.
Tires can be fun and very useful. Just keep in mind that old tires, laid on the sides, hold water/rain and when the sun heats them this is where Mosquitoes and other insects like to lay there eggs.
Wooden Shipping Pallets
Far and Few Between there are some Wooden Pallets that, with work, would work for your Cat Agility. These are the Heavy Built, 2" x 4" new wood, or larger. Some are made heavy. Most are not.
Wooden Pallets, soooo much you can do with them, make with them, decorate with them. But for the average Wooden Pallet... you could take them apart and use the wood to build all types of Pieces Of Cat Agility Equipment.
However. That said. You could make an Arena/fenced in area with upright Wooden Pallets, it will take some work, and might now look that nice when you are finished, but you could use them for this.
Do NOT Steal Traffic Cones!
Traffic Cones are used in Construction Areas for the Public's Safety. DO NOT REMOVE THEM! Imagine how terrible you would feel if your own family member or friend were hurt or killed because you thought it would be alright to steal "a few cones" from the Roadway.
Even those Traffic Cones set off to the side of the road, when the work is completed, belong to someone else. They are NOT left there for people to Steal for their own use.
You can now easily and affordable buy Sports Cones.
CHEAP/INEXPENSIVE ANIMAL/CAT AGILITY EQUIPMENT
Dollar Store Pool Noodles Animal Agility Equipment
Hula Hoops
Did you know you can still purchase Hula Hoops, here in the USA that is, for $1 each? Yes. You can. Try the Dollar Tree. While you are there, look around. You might be surprised what you will find.
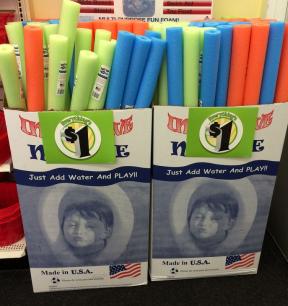
Pool Noodles
I bought my Pool Noodles when I was at the Dollar Store looking for something else. When I saw them, for $1 each, I bought them. They seem to sell very quickly, there is so much you can do with them, and I wanted to get them ALL in the Lime Green to match my Horse and other Agility Courses.
These can be used to make so many types of Animal Agility Equipment. Not only are these inexpensive, they are pretty safe to use with Animal, of any species, Agility Equipment as a foundation.
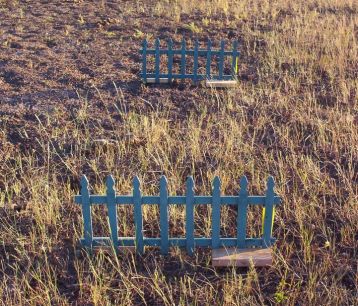
Fence Jumps
I bought these, inexpensively, at a large Hardware Store. They work well for cats or rabbits or puppies and small dogs, as well as ferrets.
You might want to by two of each Jump you would like to set up to make the Fence Jump wider so that your cat does not try to avoid going over and run right next to these jumps.
Holiday Themed Course Items
Have Fun and mark the Seasons with Holiday Items on your Agility Course. You can find inexpensive items at many stores, including, again, the Dollar Tree....no, I don't work there or own stock in the store.....I probably should.
Small Sports Cones
Small Sports Cones are better than NO Cones. Small Sports Cones can not only be used for Weaving, but also to mark areas.
Wood For Building
Many of the Hardware Stores have a place they put "not so perfect" wood pieces. Some large, some not. Many times they sell these for pennies on the dollar. There is no reason a lot of this wood could not be used to make Jumps or other Agility Equipment.
The contents of this page for Cat Toys and Agility Equipment DIY is still under construction. Please check back later!
-- The Siamese Song Team
Wed, 22 Aug 2018 10:36:18 -0400
| 


 In the high plains of South Dakota, USA