|
Cat Crafts
Page Under Construction
Ideas, Information and Patterns for making ~ DIY ~ your own Cat, Feline, Kitty, Kitten Toys and Other Cat Items. Some Items Will Take Less Than 1/2 Hour! ~ Some, Only Minutes!
Cat Cue Stick ~ Feathered Teaser Stick ~ Cue Stick with Treat Cup 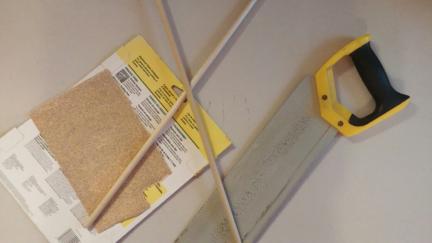
Cat Feathered Teaser Stick You Need:
A thin wooden dowel
saw and sand paper
you might want to paint your wooden dowel
Some Feathers
needle and thread
duck or electrical tape
a short cord or piece of rope, however long you would like for it to be
if you like, add a small bell or two
Cut your wooden dowel to the size you would like to use for your own cat. Paint or not.
Sew the feathers to one the end of cord, if you do not sew, just tape well, but the feathers will come out easier when Kitty plays with it.
Tape the other end of the cord to the wooden dowel.
Cue Stick/Wand with Treat Cup
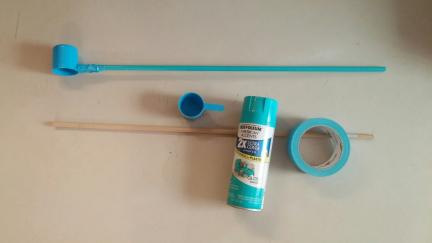
You will need:
Wooden Dowel or the other half if you cut your dowel in half for a Feather Teaser
Saw and Sandpaper
Paint
Small Scoop from coffee or the like or Spoon
Duct Tap
Cut a wooden dowel to approx 18" (1' - 2' is fine)
Sand paper the end where you made the cut
Paint to desired color or leave as is...let dry.
Using Duct Tape, and it comes in so many colors and prints now, tape your scoop or spoon on one end.
These type of Cue Sticks are really good for setting a treat, or scoop of canned cat food inside of, to teach your cat to follow the Cue Stick and get it's treat as soon as it gets to where you have asked it to be. Really good for Agility Training.
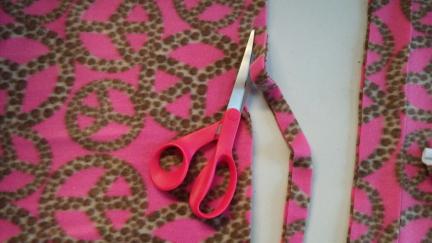 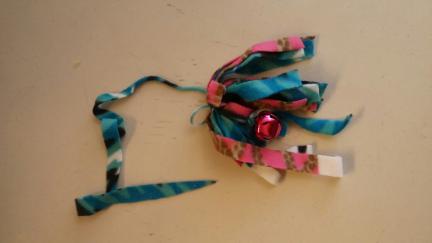
These are so easy to make and so enjoyed by cats and kittens!
But good/thick Polar Fleece. You do not need much. If you know someone working on a Fleece project, ask for the scraps. Scraps can be cut into strips in a circle and work very well.
more to come...
Stuffed Kitty Toy with or without Cat Nip 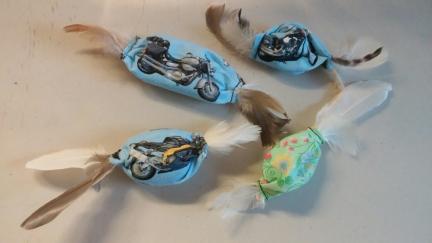
You Will Need:
Small Pieces of Fabric approx 5" x 4", but any scraps will do...and if you are setting up the sewing machine, make more than one of these and put some of the extra finished toys up for another "new toy day". Think Holiday Prints and think of friend's cats that might like a little toy too.
Stuffer...could be cotton balls, batting or stuffing from craft stores.
Crinkle Noise, think the inside of the box wax paper from crackers. Wash, of course.
A Few Feathers. Our birds moult here so we have many
A sewing machine or needle and thread.
Bell for inside or not
Cat Nip for inside or not
Turn the little piece of fabric, right sides together and make one stitch down the 'long' side of your fabric piece. Turn inside right.
Roll one end, about 1/2" to 1" down from the edge, stick your feathers into the area you will stitch so that the feathers will stick out as 'teasters'. Sew tight.
Stuff whatever you are putting into your toy. Cotton, crinkle, bell, catnip, crinkle, cotton. You want each end of your toy craft to have a soft stuffing.
Twist and add feathers to that end and sew shut.....easy!
Give this to your cat and watch it LOVE your crafting!
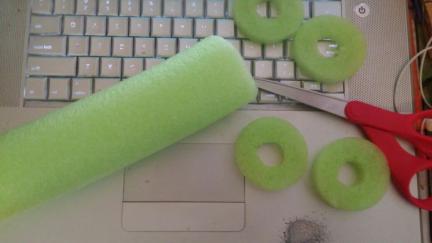 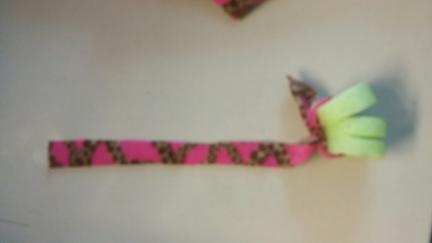
Pool Noodles are not only good for the Pool, they are GREAT for Crafts. I bought mine at the Dollar Store and use them for all sorts of things...see faroutliving.com for Pool Noodle Craft Ideas.
This one I cut into little sections. Once of these will be given as is to Mrs. Dillion to bat around. The others will be strung into a strip of Polar Fleece for a bigger toy. These, strung, can also be hung from chairs or crate fronts or such.
You could wash these strung toys in the washing machine with towels on cold. Hang to dry.
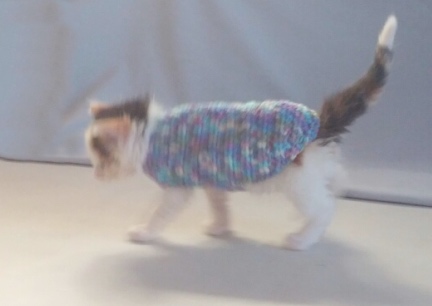
Cat Sweaters should fit Kitty snug, other wise a cat will 'step' or 'roll' out of it, worse, could get caught inside of it.
In the photos here you can see Mrs. Dillon wearing a sweater I made for my Guinea Pigs...it fits her for now. I will, of course, need to make her a larger one as she grows.
You will need to measure your cat before starting your sweater, and because you are making Kitty a Custom Sweater, you really need to have a bit of experience with either knitting or crochet. If you knit, you need knitting needles of the size you have decided to use for the size of stitch you want for your Cat's Sweater. If you crochet, same thing, choose the size of crotchet hook you want to use.
Depending on the type of stitching and size of your stitches, you will only need one or two at the most, skeins of yarn. Buy two if you want contrasting, or three if you are doing some sort of pattern that calls for it.
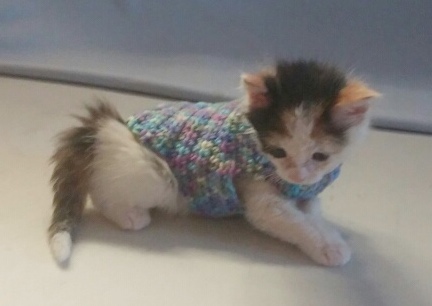
Teach your cat to wear clothing so that it is comfortable in them.
I LOVE veragated yarn. It is not only pretty to look at, but hides a lot of errors that can be made as a person knits or crochets along. It also comes in so many seasonal and holiday colors.
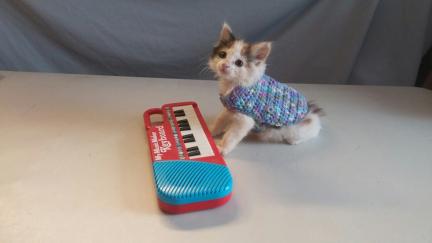
Once your cat is comfortable wearing Clothes, it will be able to do the little things you teach it while wearing them, adding 'the cuteness factor' to every little thing it does.
KITTEN SWEATER - CROCHETED 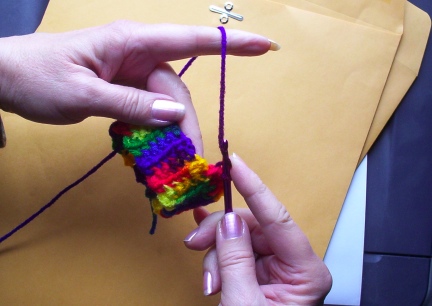 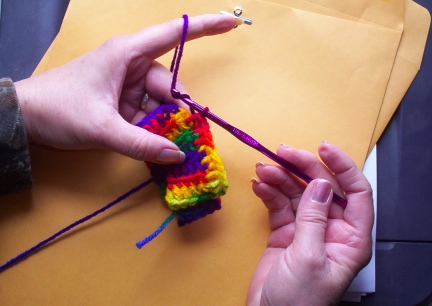 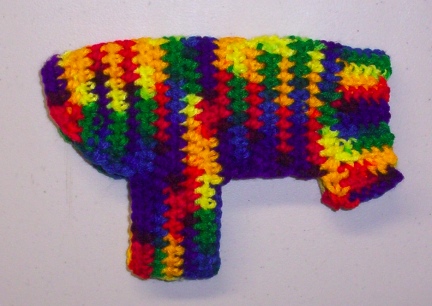
This little sweater will only take an hour or so. I used an H hook and Mexican Rainbow colored variegated medium weight yarn.
Chain 7
Make a cuff by single stitching into the front one piece of yarn in each stitch. Chain one and continue this for approx. 7". Slip stitch your two ends together and turn inside out. If you turn your sweater and the yarn is coming up from under the neck cuff, turn the cuff back to the original position and flip the other direction.
Slip stitch four stitches away from the middle of the cuff (where the seam is.
Chain one and do a 1 1/2 stitch all around until the last eight. You will be four stitches from the seam of the cuff.
Chain one and turn, you will put in an additional 6 rows of this length.
On the 7th row when you get to the end of the sweater body, chain 25 (this will be your belly band.
For the next five rows you will be making your belly band as you add to the sweater.
The next two rows will end equal to the front of the sweater before the belly band was added.
Decrease a stitch in either end of the next to rows.
Decrease twice end each end of the next three rows
Tie off and tuck extra yarn
Add a button on the outside of the belly band so that when buttoned the band tucks under the sweater against the Kitten's body. The button will add adaptability to the sweater.
Put on your kitten and enjoy....be sure to get a photo!
Your new sweater is of course machine or hand washable. I hang mine to dry.
To continue to use this pattern as your kitten grows, use a larger Crochet Hook and or add stitches...
We also sell these sweaters in our on line store.
This is a pattern that I reworked for a Cat Body....but measure your cat and make any adjustments you need to make as you create your own Cat's Sweater in the colors and type of Yarn you want to use. Using a larger Hook will make the item larger, using a smaller Hook will make it smaller. This pattern is NOT the one I used that you see in the photos here.
Your Will Need:
Yarn: Approx 2 Skeins
Crochet Hook: Size I
Yarn needle
Gauge: 12 sts = 4”; 16 rows = 4” in pat. CHECK YOUR GAUGE. Use any size hook to obtain the gauge.
SPECIAL ABBREVIATIONS:
Lsc (Long Single Crochet) = Insert hook in st indicated one row below and draw loop through, yarn over and through 2 loops on hook. Skip st under Lsc.
dec (decrease) = draw up a loop in next 2 sts, yo and draw through all 3 loops on hook.
PATTERN:
Row 1 (Wrong Side): With CB, ch 1, sc in first sc, * Lsc over next sc, sc in next sc; rep from * across; turn.
Row 2: Ch 1, sc in each st across changing to CA in last st; turn.
Row 3: With CA , rep Row 1.
Row 4: Rep Row 2 changing to CB in last st.
Rep Rows 1-4 for pat.
NECKBAND: With CB, ch 6.
Row 1 (Right Side): Sc in 2nd ch from hook and in each ch across; turn – 5 sts.
Row 2: Ch 1, sc in back lp of each sc across; turn.
Rep Row 2 until 29 rows in all have been worked, changing to CA in last sc of last row. Fasten off CB.
BODY- Row 1 (Right Side): Working across long edge, ch 1, sc in each row end across; turn – 29 sc.
Row 2: Ch 1, work 1 (2, 1) sc in first sc, * 2 sc in next sc, sc in next sc; rep from * across – 43 sc.
Row 3: Ch 1, sc in each sc across, changing to CB in last st; turn.
Now work in pat for 2 rows.
Divide for Leg Openings- Row 1 (wrong Side): Keeping continuity of pat, work across first 5 sts; turn. Work even in pat on these sts for 9 more rows. Fasten off. With wrong side facing, skip next 3 sts of last long row for leg opening; join yarn and work in pat across next 27 sts for back for 10 rows. Fasten off.
With wrong side facing, skip next 3 sts of last long row for 2nd leg opening; join yarn and work in pat across last 5 sts for 10 rows. Do NOT fasten off.
Next Row- Join Underbody: Work in pat across first 5 sts, ch 3, work across next 27 sts, ch 3, work across last 5 sts; turn.
Next Row: Work in pat across first 5 sts, sc in next 3 ch, work across next 27 sts, sc in next 3 ch, work across last 5 sts; turn – 43 sts.
Work 1 row even in pat
Shape Back: Keeping continuity of pat, dec 1 st each end of next row, then every other row 13 times – 15 sts. Fasten off.
Leg Openings-Rnd 1: With right side facing, attach CB in any st at leg opening; ch 1, sc evenly around; join with a sl st in first sc.
Rnd 2: Ch 1, sc in same st, * dec, sc in next st; rep from * around, adjusting at end of rnd as necessary; join.
Rnd 3: Ch 1, sc in each sc around; join.
Rnds 4 and 5:
Rep Rnds 2 and 3.
Rnd 6: Ch 1, working from LEFT to RIGHT, work 1 rnd Reverse sc. Fasten off.
FINISHING: Sew underbody seam from Neckband to the first shaping row of Back.
Edging: With right side facing, join CB in seam; ch 1, sc evenly around entire edge working 3 sc in corners; join to first sc.
Next Rnd: Ch 1, working from LEFT to RIGHT, work 1 rnd Reverse sc. Fasten off. Weave in ends.
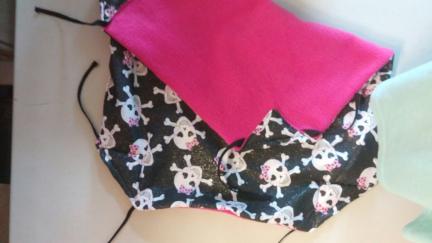
First you will have to decide where you will be hanging this Hammock you want to make for your Cat. That might help you decide on the size; that and how large your cat is, or is going to be.
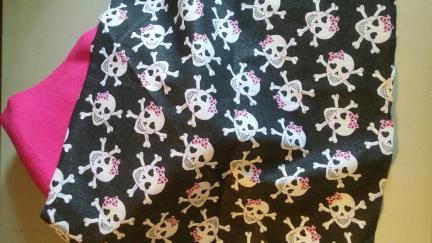
You will need two layers of fabric. It is nice to make one side either, fake fur or polar fleece. You will also need a thicker Bias Tape. This will hold the two fabrics together and be your ties at the corners.
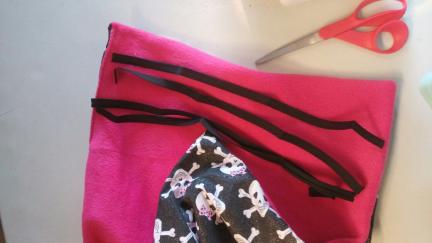
Your Bias Tape needs to be cut to approx 12" each. You will need 4 pieces, one for each corner.
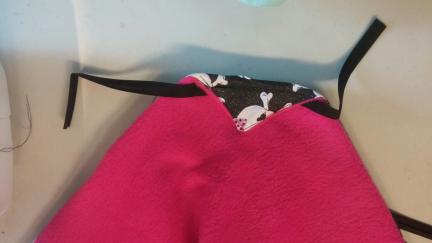
I sewed my bias tape into each corner so that it kind of 'rounded off' the corners for hanging. You could, if you like, tuck the bias tape into your corners as you sew the two pieces of fabric together. When it is turned outside right, the taps will be there to tie unto the area you want your Kitty Hammock hung.
coming soon
Coming soon
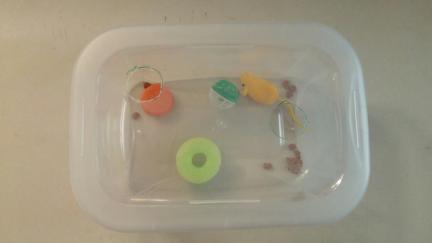
This is a fun and easy craft to make a toy that Kitty will LOVE! A Cat Treasure Box.
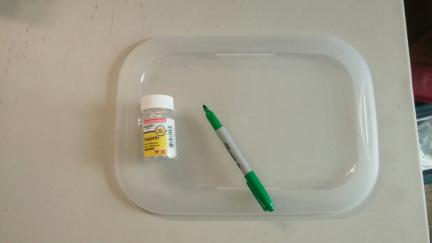
Your Will Need:
One any size storage box/container, I used a Shoe Sized Storage Box
Something small and round to trace, I used an aspirin bottle
A very shape knife or razor
something to cut on...such as wood
sandpaper in a very fine grit or nail file
a few Kitty Toys
a few Cat Treats
Maybe a little Cat Nip
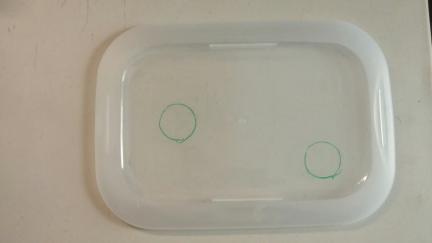
Take the lid off your storage box and trace a couple of holes that are big enough for Kitty's hands, but not Kitty's face. Place these anywhere on the top of the lid you would like, you may even put some into the sides of the box too, and add as many or as few holes as you would like.
Cut the holes out. Sand the holes is they are sharp with a nail file or sandpaper.
Place a couple of Cat Toys, a few Cat Treats, Cat Nip if you like, into the box. Put the lid on the container and make sure the lid fits tight.
Show it to Kitty and give it a whirl, or shake, so that the items move about. Set the box in front of Kitty and watch the fun.
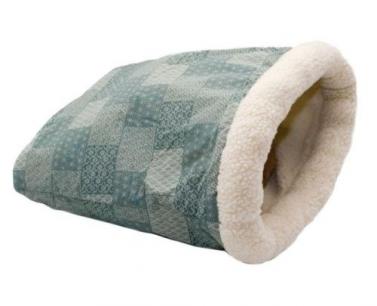
Cats LOVE these Fabric Sacks! You will be able to pick out your favorite, cute kitty print or furniture matching fabrics for your own cat's Bed Bag.
For the one I show in these photos, I used scrap fabric I had around. And the whole craft, start to finish, only took me 20 minutes.
You will need:
approx. 1/2 yard of fabric
the same amount of fabric for the liner, you could use; Polar Fleece, Fake Fur, or just another cotton blend in a matching or contrasting print.
Scissors
Thread
Sewing Machine
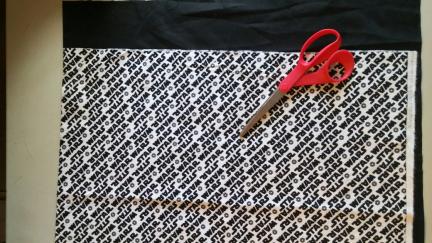
These are so easy to sew and fun to make and you will enjoy seeing your kitty playing and sleeping inside the bed your crafted for it.
Cut your outer fabric to approx 45" x 18". Fold over, right sides together. Sew up both sides, leaving the top open, sew this with the right sides together.
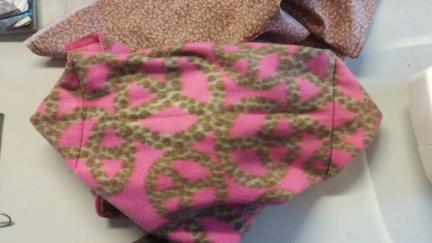
At the bottom of each side where the seams meet the bottom, turn your piece and sew a "box stitch" or "bottom" or "gusset" into each side. Make about a 6" seam.
Cut your inner fabric just the same, only about 1/4" smaller, so that it fits down into your outer side well. Sew it the same, but leave about 8" open on one of the sides, approx. 6" down.
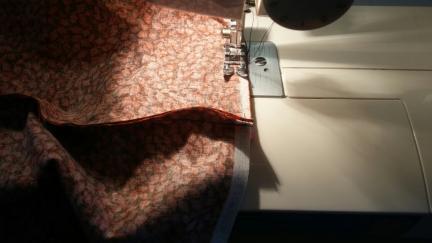
Sew the two pieces together, right sides together, lining up the side seams.
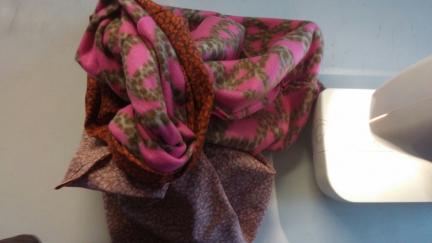
Turn the piece, now sewn together, using the opening at the side of the inner piece. Tuck, Tuck, Tuck each corner as you set the inner side into the outer side of your bag.
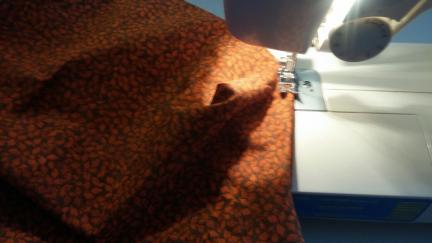 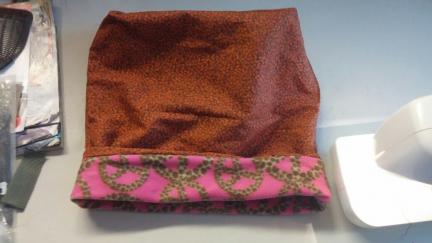
Pull the side back out of the bag, just far enough to sew the seam down, after tucking the raw edges in. Make your seam. Tuck the bag back together. Fold your outside liner over the top about 4" and pull tight at the two sides to set snug.
Your new Bag Bed or Sack Toy is ready for kitty!
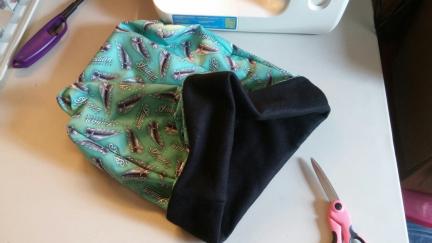 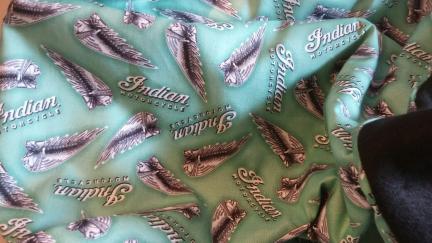
I made this one for some friends cats. Our friends bought new Indian Motorcycles the Summer I made this, and I thought this would be fun for them, all, cats and humans. I also sent the Motorcycle Cat Toys with the Indian Motorcycle print Cat Sack.
Hobbies, Holidays, or match your furniture...this Cat Sacks are fun.
A 5 Gallon Bucket with a Lid can become not only a Pedestal for tricks, but also a Toy Box for all those Kitty Toys.
Cover the inside of the lid with non-slip surface...a Yogo Mat cut to size would work great (just vacuum to clean hair out now and again). Cut your Yoga Mat to size then glue it down with a good glue that adheres to plastics. Let set 24 hours minimum.
Duck Tape comes in a variety of colors and prints, choose one and cover your bucket with it. You might want to match your other Trick Props or Agility Equipment.
Use this Pedestal for your cat to go to after a trick, to do tricks such as 'sit', 'shake', 'wave', 'spin' and more...
And when you are finished training or showing off your cat to others, pack up Kitty's 'stuff' inside the bucket and put the bucket in it's storage area, or where Kitty can get up on it and feel safe.
Be aware that Kitty Litter buckets normally have a more narrow bottom than their tops are. This will take away the stability of the bucket that Kitty is jumping up on and working on top of.
-- The Siamese Song Team
Wed, 22 Aug 2018 10:37:07 -0400
| 


 In the high plains of South Dakota, USA
 In the high plains of South Dakota, USA